Rear Extension Ideas for Semi-Detached Homes in Upminster

You’ve probably looked out at your garden more than once with a vague sense that something could happen back there. A kitchen that works but only just. A dining area that technically seats six if nobody moves their elbows. A garden-facing wall with nothing but a small window and a lot of missed potential.

For semi-detached homeowners in Upminster, a rear extension is often the most effective answer – not just for the square footage, but for what it does to how the house actually feels to live in.

Why Rear Extensions Work Well for Upminster Semis

A lot of the semi-detached stock in Upminster was built in an era when rooms were rooms and open-plan living wasn’t really a concept. The layouts are functional, but they can feel chopped up – separate kitchen, separate dining room, a living space that doesn’t quite connect to the garden in any meaningful way.

Extending the rear changes all of that. It opens up the back of the house, brings light in from a direction that existing rooms often lack, and creates the kind of flow between indoors and outdoors that genuinely changes how you use the space day to day. In a competitive Essex property market, it also tends to add more value than almost any other single improvement.
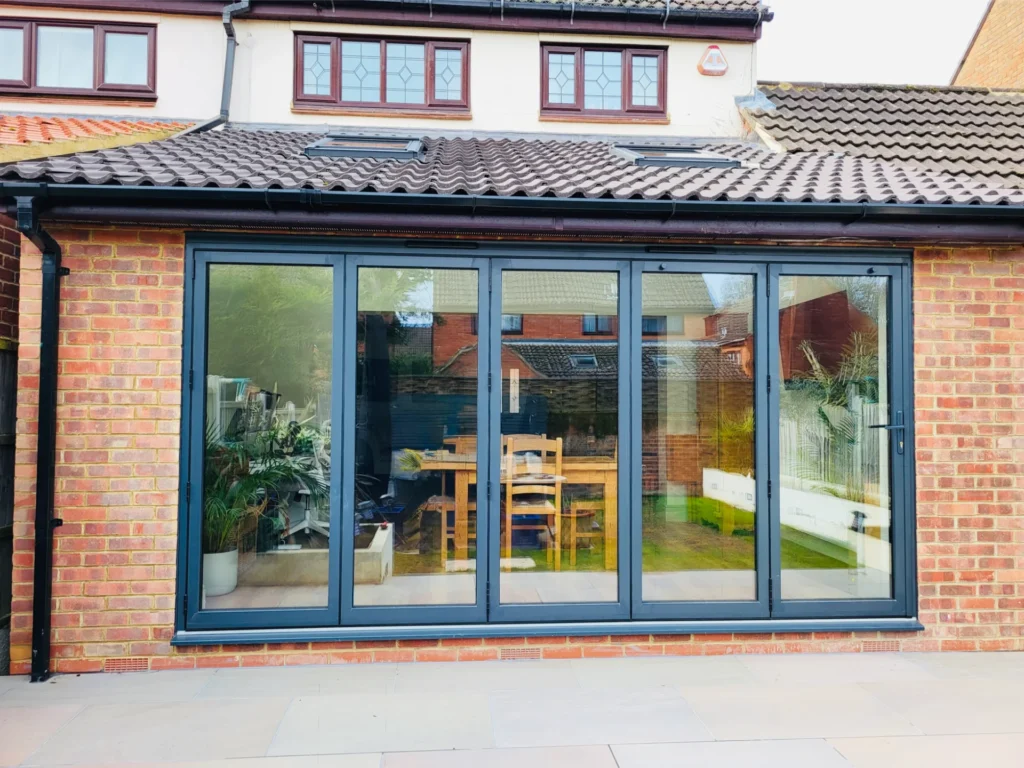
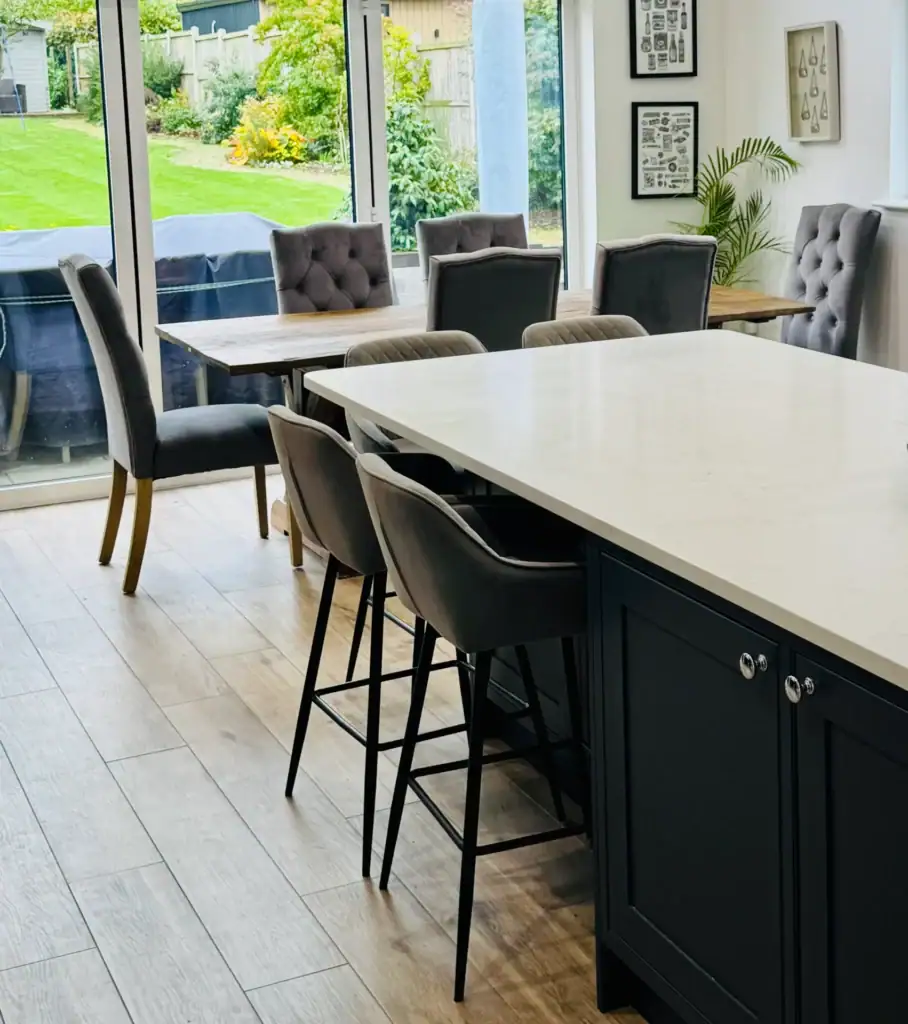
Architectural Hub Bracken Drive Warley Project

Five Rear Extension Ideas Worth Considering in Upminster

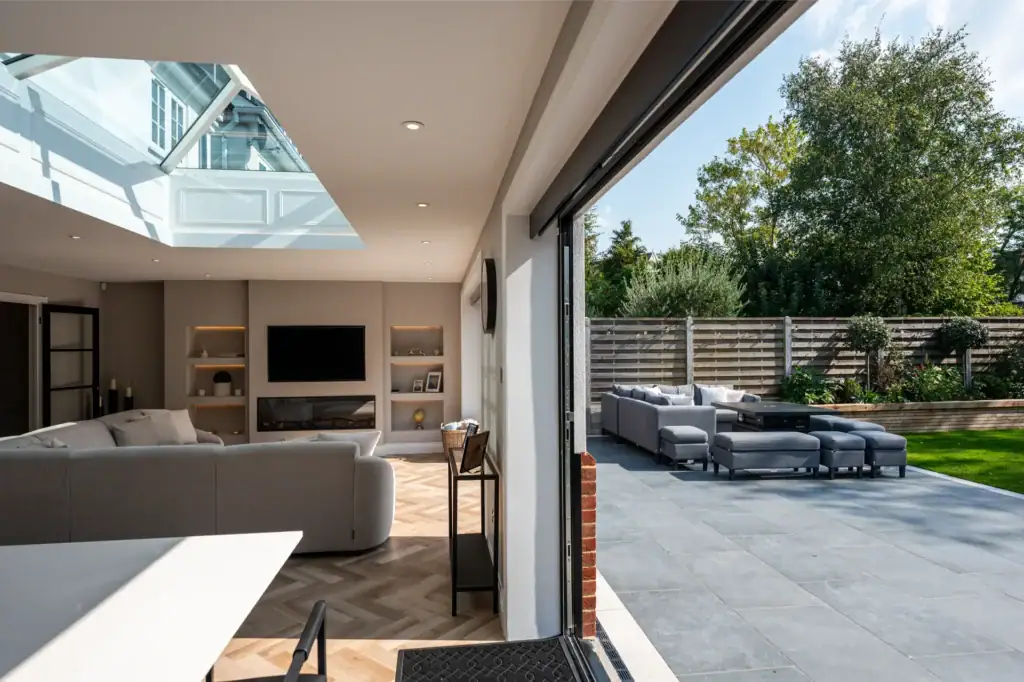
The open-plan kitchen-diner. This is consistently the most requested layout, and the results tend to justify the reputation. Combining kitchen, dining, and living into one connected space works particularly well for family life – it’s easier to cook and supervise children at the same time, easier to host, and much easier to feel like you’re part of what’s happening rather than isolated in a separate room. Pair it with large glazed doors or a rooflight and the light transformation alone is worth the build.

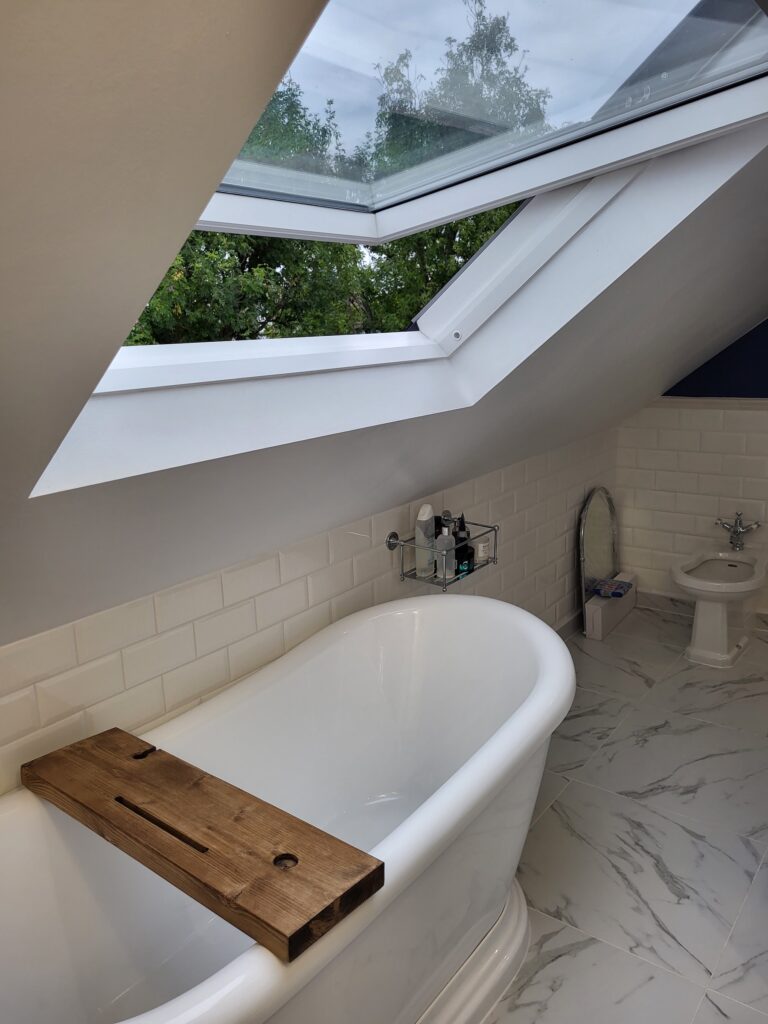
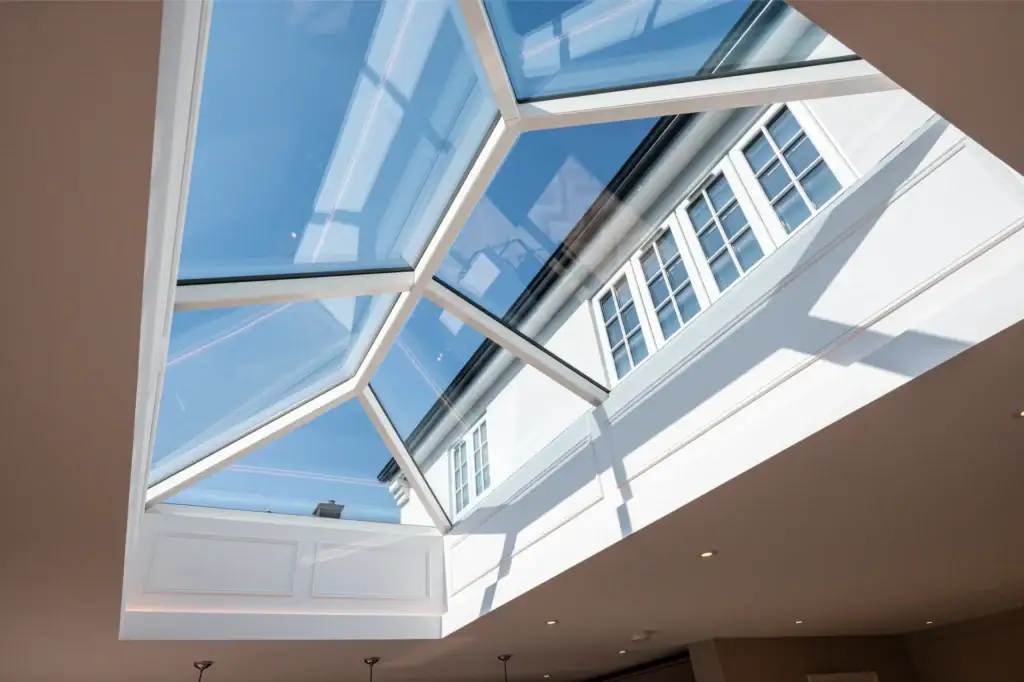
The classic single-storey extension. If the goal is more space without dramatically rethinking your home’s structure, a single-storey rear extension is usually the most straightforward route. A flat roof with a lantern or skylight, sliding or bifold doors opening onto the garden, brickwork that either matches the existing house or makes a deliberate statement – the options are wide and the approach scales well from modest budgets to high-spec finishes.

The wraparound extension. If your semi has unused side access, combining side and rear into an L-shaped footprint can completely reinvent a cramped layout. It’s a bigger project than a straightforward single-storey extension, but for older Upminster semis built with multiple small separate rooms, the transformation tends to be significant. The additional width at the back of the house creates room to breathe that a straight rear extension can’t always achieve.

The light-first extension. Sometimes the priority isn’t square footage – it’s making the existing space feel less dark and disconnected. A glass-focused extension with floor-to-ceiling glazing and slim-framed sliding doors can make a modest addition feel genuinely spacious, and it creates a real connection to the garden rather than a theoretical one through a small window. Worth serious consideration if your home backs onto outdoor space you currently barely use.

The separate living room. Not every household wants everything open-plan. A second, quieter living space – a garden-facing snug, a TV room, a room that isn’t subject to the noise and chaos of the main kitchen-diner – can be one of the most practically useful things you add to a busy family home. The best extension isn’t always the most architecturally ambitious one.

Planning Permission: What to Know

Most rear extensions on semi-detached homes in Upminster fall under permitted development, which means no full planning application is required. For semi-detached properties the standard permitted development rules typically allow a single-storey rear extension up to 3 metres deep, or up to 6 metres under the Prior Approval neighbour consultation scheme. Maximum height is generally around 4 metres, and materials should broadly match the existing house.

These are the standard rules, and they come with caveats. Your specific location, whether you’re in a conservation area, and any restrictions attached to your property or road can all affect what’s permitted. Checking with Havering Council before you commit to anything is sensible. Working with an architect who knows the local planning landscape – and has done this in Upminster before – is more sensible still. It avoids the kind of surprises that set projects back by months.

A Note on Working Next to Your Neighbour

Detached homes don’t have this consideration. Semis do. You share a wall, and your extension will affect your neighbour’s outlook to some degree – so scale, light, and privacy are worth thinking about early rather than discovering as an issue midway through the project. Keeping broadly similar proportions to any extension they might have, and being thoughtful about windows that overlook their garden, tends to make the whole process considerably smoother.

How Much Does a Rear Extension Cost in Upminster?

Here’s a rough guide to current costs:

SpecificationCost per m²
Basic single-storey£1,800 – £2,500
Mid-range£2,500 – £3,500
High-spec design£3,500+

These are starting points rather than fixed figures. Working with an architect from the beginning of the project – rather than bringing one in to formalise decisions already made – tends to produce better outcomes for the budget as well as the design. The decisions that cost the most to fix are usually the ones made before anyone with design experience was involved.

What Architectural Hub Does

Architectural Hub connects homeowners in Upminster and across Essex with architects who know the area, understand London Borough of Havering’s planning requirements, and have a track record with exactly this kind of project.

If you have a sense of what you want but aren’t sure where to start – or if you’ve got an idea and want to know whether it’s feasible – Get in touch and tell us about your home. We’ll help you figure out the right next step.
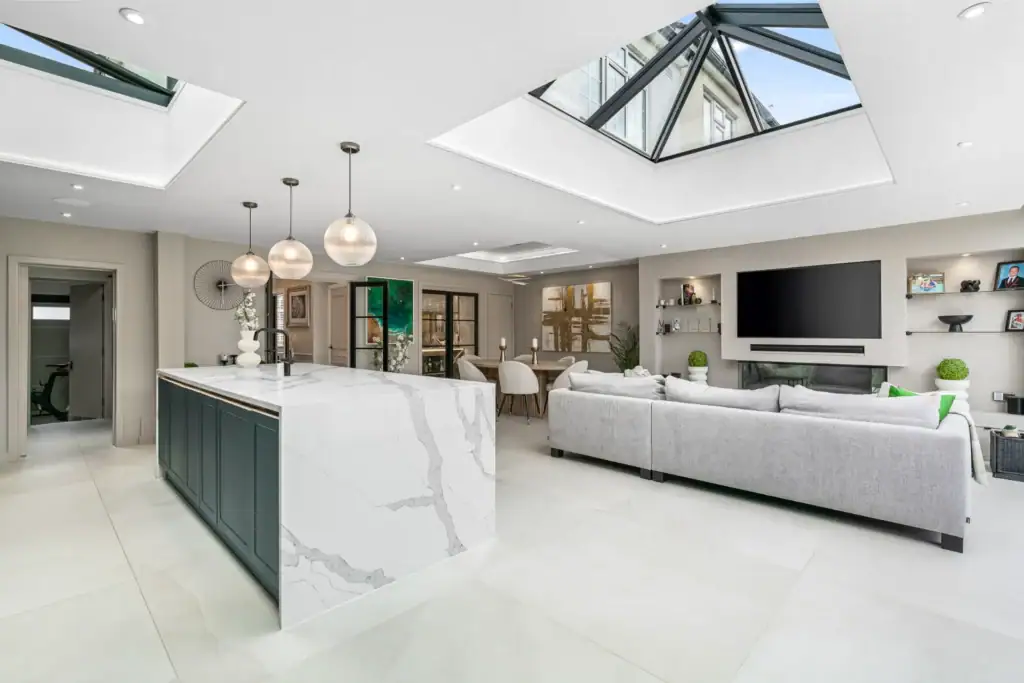
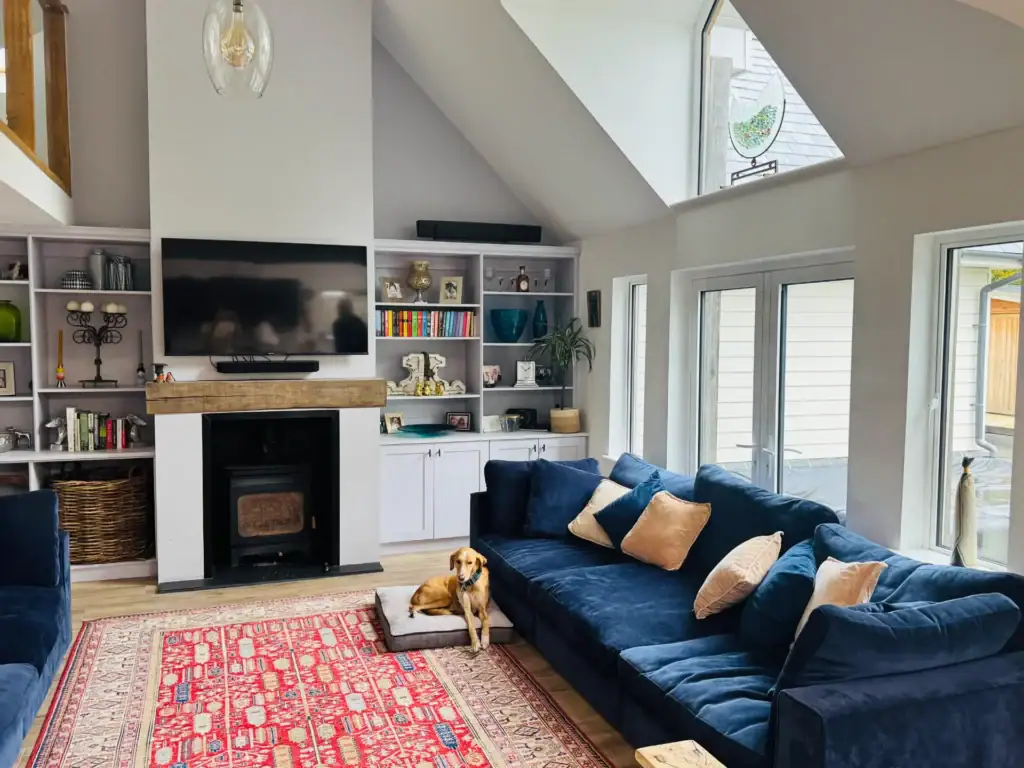
How a Rear Extension Transformed a Semi-Detached Home in Stanford-le-Hope

When George Daly contacted Architectural Hub about his semi-detached home in Stanford-le-Hope, he had a rough idea of what he wanted — more space, a better connection to the garden, a ground floor that felt less chopped up. What he didn’t have was a clear picture of how to get there.

What happened next is a good illustration of why the design process matters as much as the build itself.

The Starting Point

Like a lot of semi-detached homes in Stanford-le-Hope and Thurrock, George’s property had the bones of something much better than its current layout suggested. Good-sized plot, reasonable garden, a ground floor that had been divided into separate functional rooms in the way that made sense when the house was built but felt increasingly at odds with how a family actually lives.

The kitchen worked. The dining room worked. But they didn’t work together, and neither connected meaningfully to the garden behind them. It’s a pattern Malcolm Clarke, RIBA Chartered Architect at Architectural Hub, recognises immediately in Stanford’s semi-detached stock.

“A lot of these homes have more potential than their owners realise,” Malcolm says. “The constraint isn’t usually the plot — it’s the existing layout, and people tend to think in terms of extending what’s already there rather than rethinking it.”

The Design Process

George’s brief was fairly open, which gave Malcolm room to work. Rather than drawing up a plan that simply added square footage to the existing footprint, Malcolm came back with a design that approached the back of the house differently — a layout George hadn’t considered but recognised immediately as the right answer.

In George’s words: “Malcolm came up with a completely fresh design idea that we hadn’t even considered, and it works perfectly for our needs.”

This is the part of the process that often gets undervalued. Most homeowners arrive with a reasonable idea of what they want — more kitchen space, bifold doors, a rooflight — but the specific configuration of those elements, how the new space connects to what already exists, where the light comes from and at what time of day, how the extension affects the garden — these are design decisions that make a significant difference to whether the finished space actually works. Getting them right at the drawing stage costs nothing. Getting them wrong at the build stage costs a great deal.

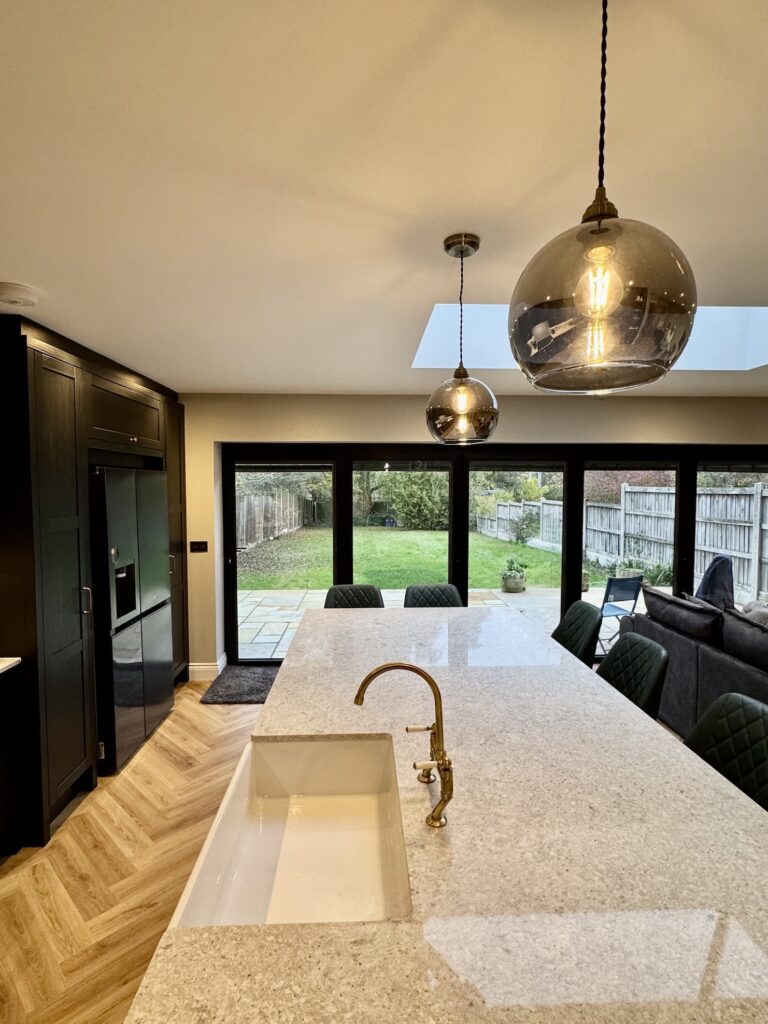
Architectural Hub Millsmead rear extension

An example of an open plan kitchen, living and dining area designed by Architectural Hub

From Design to Planning to Build

Once the design was agreed, Architectural Hub handled the planning application on George’s behalf. For most rear extensions on semi-detached homes in Thurrock, permitted development covers the work without a full planning application — but the rules have conditions, and having an architect who knows the local planning landscape means the application goes in correctly the first time rather than coming back with queries.

Once planning was approved, Architectural Hub produced the detailed technical drawings George needed to go out to builders for accurate quotes. This stage matters more than most homeowners expect. Vague drawings produce vague quotes, which means the tender process becomes a comparison of different assumptions rather than different prices for the same job. Detailed drawings give builders exactly what they need to price accurately, which makes choosing between them considerably more straightforward.

“He prepared all the design drawings, submitted the planning application for us, and once it was approved, produced detailed drawings so we could get accurate quotes from builders,” George says. “The whole process felt seamless and well thought-out.”

What Rear Extensions Typically Involve for Semis

George’s project followed a process that’s broadly similar for most rear extensions on semi-detached homes in Stanford, even though the design specifics vary considerably from one property to the next.

The initial consultation establishes what the homeowner actually wants — which isn’t always the same as what they say they want at the first meeting. A family that asks for a bigger kitchen sometimes needs a completely rethought ground floor. A homeowner who wants bifold doors sometimes needs more rooflight and less glazing at ground level, depending on which direction the garden faces. These are the conversations that shape the design before a line is drawn.

From there, the process moves through concept design, planning submission where required, technical drawings, and then the build itself — which Architectural Hub supports but doesn’t manage directly. The architect’s role during the build is to answer queries, review progress against the drawings, and make sure what gets built matches what was designed.

For most single-storey rear extensions in Stanford, the timeline from initial consultation to planning approval runs between three and five months. The build typically adds another three to four months depending on complexity and contractor availability.

How Much Does a Rear Extension Cost in Stanford?

Costs can vary depending on size, design, and specification, but as a rough guide:

Architectural Hub’s fees for design, planning, and technical drawings are separate from the build cost and are discussed transparently at the outset. There are no hidden stages or unexpected additions as the project develops.

Is a Rear Extension the Right Move for Your Home?

Not every semi-detached home in Stanford is a straightforward rear extension project. Some properties suit a different approach — a wraparound that combines side and rear, a single-storey addition that prioritises light over footprint, or internal alterations that unlock more value than an extension would.

The honest answer to whether a rear extension is right for your home is that it depends on the specific property, the specific layout, and what you’re actually trying to achieve. That’s the conversation the initial consultation is designed to have.

Architectural Hub offers a free consultation for homeowners in Stanford, the wider Thurrock area and across Essex. You bring the ideas — even rough ones — and Malcolm will tell you honestly what’s feasible, what the process looks like, and what it’s likely to cost.

Get in touch for a free consultation.

Common Mistakes Essex Homeowners Make When Creating Open Plan Spaces

At Architectural Hub, we work with homeowners across Essex and the South East on open plan renovations every week. From knocking through a kitchen and dining room to creating large rear extensions, open plan living is one of the most common requests we see.

And while the end result can be fantastic, we often meet clients after things haven’t quite gone to plan – usually because a few key steps were missed early on. Based on our experience, here are the most common mistakes homeowners make when creating open plan spaces, and how to avoid them.

Assuming an Internal Wall Isn’t Load Bearing

One of the first questions we’re asked on almost every project is: “Can this wall come down?”

In many Essex homes – particularly 1930s semis and older properties – internal walls often support floors or roof structures above.

We’ve been involved in projects where walls were removed before a proper assessment, leading to:

Before any wall is removed, we always assess the structure properly. This allows us to confirm whether the wall is load bearing and design the right structural steelwork to keep the home safe.

Treating Steelwork as a Necessary Evil

Steel beams are essential for most open plan layouts, but they’re often seen as a technical detail rather than a key part of the design.

We regularly come across projects where steelwork was:

The result is often bulky beams boxing into rooms or columns breaking up what should be an open space. When steelwork is designed early – alongside the layout – it supports the structure quietly and efficiently, without dominating the space.

Three Corners Sevenoaks

Knocking Through Before Thinking About How the Space Will Work

Another common scenario we see is homeowners removing walls first, then trying to work out how the space will function afterwards.

This can lead to:

On every project, we start by understanding how the household actually lives. How do you cook? Where do you sit as a family? Do you need space to work from home? Designing around real life is what makes an open plan space feel comfortable, not chaotic.

Forgetting About Light, Views and Sightlines

Removing walls doesn’t automatically guarantee a bright space. We’ve seen open plan renovations that still feel surprisingly dark because glazing and sightlines weren’t considered properly.

In many of our Essex projects, the most successful open plan designs combine internal changes with:

Structural steelwork often makes these openings possible, but only when it’s planned as part of the overall design, not added later.

Overlooking Electrics, Heating and Everyday Practicalities

Walls don’t just hold buildings up – they hide services. When walls come down, electrics, plumbing and heating all need to be rethought.

We often see open plan spaces let down by:

Planning these details early makes a huge difference to how the space feels and functions once it’s finished.

Assuming Open Plan Living Is Right for Every Home

Open plan living isn’t a one-size-fits-all solution. Some homeowners later realise they miss quieter spaces, storage or the ability to shut a door.

In these situations, we often design:

The goal isn’t just openness – it’s creating a space that works for how you live.

Underestimating Building Regulations and Structural Approval

Structural alterations must comply with UK building regulations, and this is where problems can arise if projects aren’t properly managed.

We’ve helped homeowners resolve issues where:

By coordinating structure, design and approvals from the outset, we help avoid delays, stress and costly remedial work.

Why Experience Matters in Open Plan Renovations

Most of these issues don’t come from bad intentions – they come from a lack of joined-up planning. Open plan living sits at the intersection of structure, layout and lifestyle.

Our role at Architectural Hub is to bring those elements together, ensuring:

Creating Open Plan Spaces That Genuinely Work

A successful open plan renovation should feel effortless once it’s finished – but that only happens when the right decisions are made early on.

Our advice is shaped by real homes and real projects across Essex and the South East. By learning from the most common mistakes we see, homeowners can approach open plan living with confidence and clarity.

Three Corners Sevenoaks

Thinking About Opening Up Your Home?

If you’re planning an open plan renovation, extension or structural alteration, early advice can save time, money and stress. The team at Architectural Hub works closely with homeowners throughout Essex and the South East to design open plan spaces that are safe, practical and built around how you actually live.


Join the Architectural Hub newsletter today!

Top tips about architectural projects delivered straight to your inbox

Newsletter Header for WordPress

Get clear, practical advice delivered monthly — from planning permission and regulations to design ideas that add real value.

Created for local homeowners in Brentwood and Havering.

Stay informed. Avoid mistakes. Plan properly.

Join the Architectural Hub newsletter today.

Subscribe here!

Open Plan Kitchen Extensions: Design Trends in Essex Homes

At Architectural Hub, open plan kitchen extensions are one of the most common projects we work on across Essex and the South East. Often, homeowners come to us after reading about open plan living or after realising their existing kitchen no longer works for how they live day to day.

What we’ve learned from experience is that the most successful kitchen extensions aren’t just about adding space. They’re about careful planning, understanding the structure of the home and designing layouts that genuinely work – the same principles that underpin any well-executed open plan renovation.

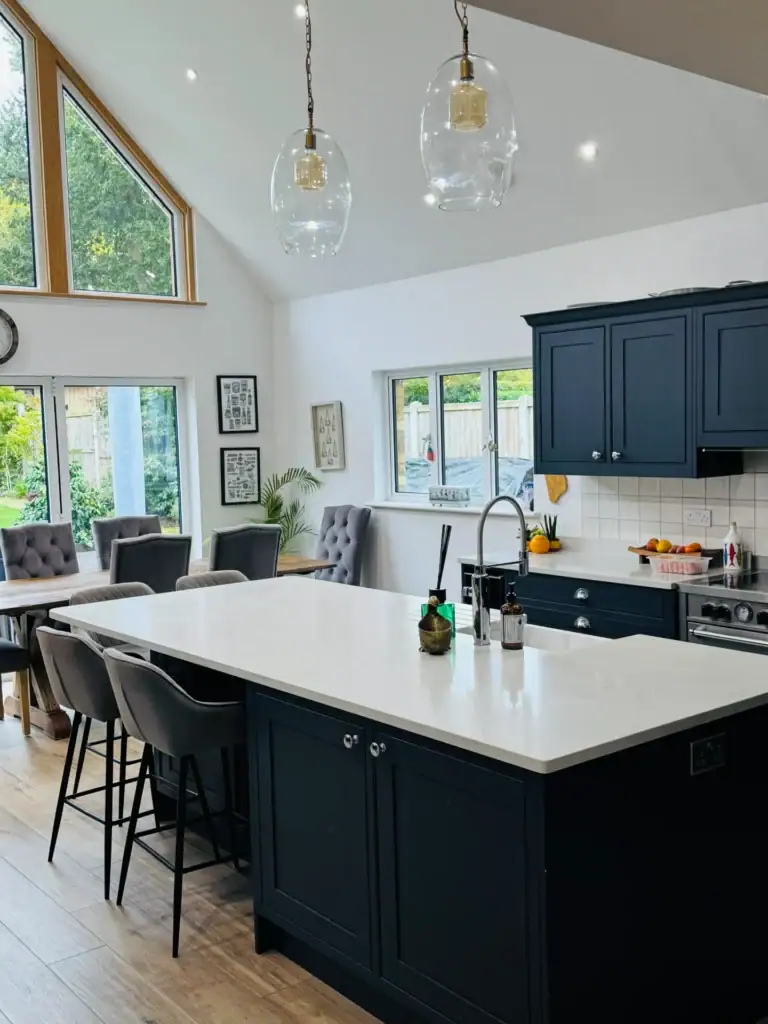
Rosemead Gardens Architectural Hub

Light-Filled Kitchen Extensions That Avoid Common Open Plan Mistakes

One of the biggest reasons homeowners extend their kitchens is to bring in more natural light. But as we often explain, simply removing walls or adding an extension doesn’t automatically guarantee a bright space.

In many of our Essex kitchen extension projects, light is carefully considered from the outset through:

Structural steelwork often plays a crucial role here, allowing wider openings and cleaner sightlines without bulky supports. When steelwork and glazing are designed together early, the result is a space that feels open, balanced and naturally bright.

Seamless Indoor-Outdoor Living Through Thoughtful Design

A strong trend we continue to see is the desire for kitchens that connect directly to the garden. Homeowners want spaces that feel sociable, flexible and suited to everyday family life.

Rather than treating indoor-outdoor living as an add-on, we design for it from the start, often incorporating:

This approach avoids one of the most common open plan mistakes: designing the layout first, then trying to “fit in” doors and glazing later.

Zoned Open Plan Kitchen Layouts That Actually Work

While open plan kitchen extensions remain popular, many homeowners now want more structure within those spaces. Completely open layouts can feel overwhelming if they aren’t carefully zoned.

In practice, we often design kitchen extensions with:

This kind of zoning addresses one of the biggest issues we see in poorly planned open plan projects: spaces that look open but don’t function comfortably day to day.

Kitchen Islands as Functional, Social Anchors

The kitchen island has become a central feature in many of the extensions we design – but only when the space allows for it properly.

We regularly advise homeowners that islands should:

When islands are introduced without proper planning, they often become obstacles rather than assets – a mistake we see frequently when layouts are decided too late.

Read about the open plan living we created for Katriena and Sean Collins in Hutton, Essex

Minimal Design Without Losing Practicality

Clean, minimalist kitchens remain popular in open plan extensions, but practicality is more important than ever. Homeowners want kitchens that feel calm and uncluttered, even when the space is busy.

Design choices we commonly recommend include:

These details help open plan kitchens feel like part of the living space, rather than purely functional rooms.

Three Corners Kitchen Extension

Exposed Steel as a Deliberate Design Feature

In some open plan kitchen extensions, structural steelwork is no longer hidden. Instead, it’s used as part of the architectural language of the space.

When designed intentionally, exposed steel beams can:

As with all steelwork, the key is early coordination between structure and design.

Sustainable, Long-Term Design for Essex Homes

Sustainability is becoming a bigger consideration in kitchen extension design, particularly for homeowners planning to stay in their homes long term.

Across many of our projects, this includes:

Maximising natural light also reduces reliance on artificial lighting, improving both comfort and energy efficiency.

Designed for Essex Homes, Not Generic Layouts

Essex housing stock is varied, and successful open plan kitchen extensions reflect that. From 1930s semis to period homes and modern properties, each project brings its own structural and design considerations.

Rather than applying standard solutions, we always assess:

This tailored approach helps avoid many of the open plan pitfalls homeowners encounter when designs aren’t properly thought through.

Why Early Planning Is the Common Thread

Whether we’re advising on open plan living or designing kitchen extensions, the same principle always applies: early, joined-up planning makes all the difference.

By coordinating structure, steelwork, layout and lifestyle from the start, we help homeowners avoid:

It’s the same thinking that underpins our advice on avoiding common open plan mistakes.

Open Plan Kitchen Extensions in Essex and Kent That Truly Work

A well-designed open plan kitchen extension should feel natural, practical and effortless to use. When structure and design are aligned from the outset, the result is a space that enhances everyday life rather than complicating it.

At Architectural Hub, our guidance is shaped by real projects across Essex and the South East. By applying the same principles that help homeowners avoid open plan mistakes, we design kitchen extensions that are structurally sound, thoughtfully laid out and built to last.

Read about the open plan living we created for Harriet and James Taylor in Billericay, Essex

Planning an Open Plan Kitchen Extension in Essex or Kent?

If you’re considering a kitchen extension or thinking about opening up your home, it’s worth understanding both the design trends and the common mistakes that can arise. Architectural Hub supports homeowners across Essex and the South East with expert advice that brings structure, clarity and confidence to open plan projects.

Book a free initial consultation with us!

Loft Conversions in Essex: The Smartest Way to Add Space, Light and Value to Your Home

If you’re running out of space but don’t want to move, a loft conversion could be the most transformative change you’ll ever make to your home. It’s one of the most cost-effective, value-boosting and lifestyle-improving projects an architect can help you achieve – and it often requires far less disruption than people expect.

From creating a calm master suite to adding a dedicated home office, loft conversions turn empty, unused square footage into beautifully designed living space. But the key to a successful loft conversion is thoughtful architectural design – not just “adding a room”.

Here’s what you need to know before getting started.

Peel Chelmsford copy

Why Loft Conversions Are So Popular

1. They add huge value

A well-designed loft conversion can add up to 20–25% to the value of your property. Additional bedrooms and bathrooms are especially sought-after, and estate agents consistently report that houses with loft conversions sell more quickly.

2. They avoid the cost and stress of moving

Instead of paying stamp duty, survey fees, removals and solicitor costs, you invest directly back into your home.

3. They work beautifully for modern living

Families grow. Work patterns change. Teenagers want their own space. A loft conversion adapts your home to your lifestyle – without sacrificing garden space.

4. They make use of “dead space”

Your loft is already there. You’re simply turning wasted space into usable space.

What Can You Actually Do With a Loft?

A loft conversion isn’t just “another bedroom”. With the right architectural design, it can become one of the best spaces in the house.

Popular options include:

Our Architectural Hub team can help you get the best possible layout, maximise head height, and bring natural light deep into the space.

Do You Need Planning Permission in Essex? (The Good News: Often No)

Most loft conversions fall under Permitted Development Rights, which means you may not need full planning permission – as long as certain conditions are met.

These include:

However, if you want:

…it’s worth getting architectural advice early.

Why an Essex architect is essential here:

A quick check of local planning policy can save you weeks or months – and ensures whatever you build is legal and future-proof. Ask us about this today!

IMG

Types of Loft Conversion: Which One Is Right for You?

1. Velux (Rooflight) Conversion

The simplest and most cost-effective.
Perfect if:

2. Dormer Conversion

Adds headroom and floor space.
Perfect if:

3. Hip-to-Gable Conversion

Replaces a sloping side roof with a vertical wall.
Perfect if:

4. Mansard Conversion

A dramatic, full-roof alteration that maximises space.
Perfect if:

A good architect will help you choose the right conversion based on your structure, your lifestyle, and your planning constraints.

Design Considerations Your Essex Architect Will Handle

Architectural design turns a dusty loft into a well-functioning, comfortable room. Some essentials include:

Maximising head height

Smart placement of stairs, dormers and structural beams makes all the difference.

Letting natural light flood in

Rooflights, dormer windows and glazing options are carefully positioned.

Efficient stair design

Regulations are strict – Architectural Hub will ensure safe, functional stairs that don’t steal space from lower floors.

Structural integrity

Lofts need new floor joists, insulation, fire safety measures and possibly steelwork.

Bathroom design

Drainage, ventilation, and efficient layouts are key for loft en-suites.

Heating and energy performance

Loft rooms must meet insulation and ventilation standards – Architectural Hub will get this right first time.

Fire safety

Escape routes, fire doors and detection systems must be considered early.

Why You Should Speak to an Essex Architect Before You Speak to a Builder

Builders build.
Architects design, plan, and ensure the project is viable.

If you go to a builder too early, you may receive:

When you hire an architect first, you get:

This protects your investment and prevents misunderstandings later.

How Long Does a Loft Conversion in Essex Take?

On average:

Design + planning:
4–10 weeks (depending on complexity)

Building regulations + technical drawings:
3–6 weeks

Construction:
6–12 weeks

A smoother project depends on starting early – especially if planning permission is required.

Costs: What Should You Expect?

Costs vary, but generally:

Architectural design ensures the space is worth every penny – not just “another room”, but a truly liveable space that transforms your home.

Loft conversion Three Corners

Final Thoughts: A Loft Conversion Is One of the Best Investments You Can Make

A loft conversion can change the way you live – giving you more space, more functionality, more comfort and more value.

The difference between an “okay” loft and an exceptional loft comes down to:

If you’re thinking of converting your loft, the best first step is to speak with an architect who can help you assess feasibility, navigate planning, and design a space that feels uplifting every time you walk into it.

We would love to help you! Book a free consultation with us today!

Dormer vs Velux: Which Loft Conversion is Best for Your Essex Home in 2026?

A friendly, practical guide for Essex and Kent homeowners planning a loft project this year

If you’ve ever looked up at your unused attic and thought, “We could do something amazing with that space,” you’re not alone. Loft conversions continue to be one of the UK’s most popular home improvements – and for good reason. They’re cost-effective, they add value, and in many cases, they don’t require planning permission.

But which type should you choose? A dormer loft conversion or a Velux loft conversion?

The answer depends on your roof shape, your budget, the space you want to create, and how you plan to use the room. In the text below, we’ve broken down the differences, the pros and cons, the costs, and how to decide which type of loft conversion is perfect for your home.

Three Corners loft conversion

1. What’s the Difference Between a Dormer and a Velux Loft Conversion?

Dormer Loft Conversion – More Space, More Flexibility

A dormer is a structural extension that projects from your existing roof, creating a vertical wall and a flat (or slightly pitched) roof. Think of it as “punching out” space from your roof to create extra head height and usable floor area.

Dormers are extremely popular because they:

In short, if you want to create a proper, full-height room, a dormer is usually the best option.

Velux Loft Conversion – Simple, Affordable and Full of Light

In contrast, a Velux conversion uses your existing roof shape and simply adds Velux roof windows to bring in natural light. No major structural changes are necessary.

Homeowners love Velux conversions because they:

These suit lofts that already have good head height.

2. Costs in 2026: What Should You Budget?

Costs for loft conversions in 2026 will vary depending on your location and specifications, but here’s a realistic guide for 2026:

Velux Conversion Costs (2026)

Dormer Conversion Costs (2026)

Dormers cost more because they involve more labour, steelwork and roofing work – but they create significantly more usable space and therefore more value.

3. Space: How Much Extra Room Will You Gain?

Dormer = Maximum Space

If your current loft feels cramped or has a steep pitch, a dormer can make a dramatic difference. Homeowners often gain:

A dormer essentially transforms the space into something that feels like a proper floor of your home.

Velux = Light, Airy and Perfect if You Already Have Height

Velux conversions work well when:

The result feels light, bright and peaceful – great for home offices, studios or guest rooms.

4. Loft Conversion Planning Permission in Essex: What Do You Need?

Most loft conversions fall under permitted development, which means you don’t need full planning permission if the design follows key rules.

Velux Conversions and Planning

Rarely need permission because you’re not extending the roof – just adding windows.

Dormer Conversions and Planning

Standard rear dormers usually fall under permitted development, but you will need full planning permission if:

Architectural Hub can walk you through this and check your permitted development status, so you know exactly what’s allowed.

5. Complexities, Engineering and Build Time

Dormer Conversions Require Complex Engineering

Velux Conversions Are Less Complex and Take Less Time

If you want the quickest, least disruptive project, a Velux loft conversion might be the right choice.

If you want maximum value and space, a dormer is worth the longer timeline.

Little Gaynes loft conversion

6. How Will You Use the Space? (This Is the Deciding Factor)

This is often the biggest clue about which type to choose.

Choose a Dormer if You Want:

Dormers turn your loft into a true third floor.

Choose a Velux if You Want:

Velux spaces feel cosy, calm and full of natural light.

7. Property Value in Essex: Which Option Adds More?

Both conversions add value, but dormers typically deliver the biggest return.

Velux Value Increase

This option is ideal for boosting space without major investment.

Dormer Value Increase

Buyers love a full-size bedroom with proper head height – especially if it includes an ensuite.

8. Energy Efficiency and Comfort in 2026

Modern regulations mean that any loft conversion must meet strict insulation standards. The good news is that both Velux and dormer conversions can become warm, comfortable, energy-efficient spaces.

Homeowners especially love:

Architectural Hub will help you choose the best combination based on how you’ll use the space.

9. Choosing the Right Option: A Quick Decision Guide

If you’re still unsure about the type of loft conversion you want, here’s a simple checklist:

Pick a Dormer If:

Pick a Velux If:

If you’re in between, don’t worry – we can help you see the possibilities.

10. Final Thoughts: So… Which Conversion Should You Choose?

There’s no single “right” answer – both dormer and Velux conversions can create beautiful, practical spaces. The trick is choosing the one that suits your roof, your lifestyle, your budget and your long-term plans.

A Velux conversion is perfect if you want something simple, affordable and filled with natural light.

A dormer conversion is ideal if you want to maximise head height, create a proper new room – and add serious value to your home.

If you’re ready to explore the possibilities for 2026, the best next step is a friendly chat with the team at Architectural Hub. We’d love to show you exactly what’s feasible for your home.

Get in touch today!

New Year, New Home? You’re Already Playing Catch-Up with Planning Approvals

January is famous for lots of things – new gym memberships, new routines, and new commitments. But in the world of home improvement, January is known for something far less inspiring: A huge planning backlog.

If you’ve just decided that this is the year you finally extend your kitchen, add a bigger living space or build that new home office, here’s the reality:

By January, you’re already behind.

This isn’t to discourage you – it’s to help you understand why so many homeowners face delays. The good news? Once you know what’s happening behind the scenes, you can make smarter decisions right now to speed things up.

January Is the Busiest Month for Planning Departments

The moment the Christmas break ends, planning offices are hit with:

Decision times naturally stretch out during the first quarter of the year. A process that normally takes eight weeks can easily push into twelve or more.

So if you’re applying now, you’re joining the biggest queue of the year.

PMD and Architectural Hub project

Builders Start Filling Their Diaries in January Too

Another reason you don’t want to get stuck at the back of the line: Builders book up fast.

January and February are when reputable builders:

And here’s the crucial bit: Builders prioritise clients with approved plans.

If you don’t have drawings or planning permission yet, you’re unlikely to secure the builder you want – or the timeline you hoped for.

Why Acting Early Matters (Even in January)

Even though you’re playing catch-up, you can still get ahead of everyone else who hasn’t yet contacted an architect.

By acting now you can:

Get your design work moving

An architect will start surveying your home, preparing layouts, exploring options and guiding you through constraints.

Submit planning sooner

The earlier your application goes in, the faster you get through the backlog.

Position yourself to book a builder

Once your plans are approved, your project becomes far more attractive to the best contractors.

Avoid springtime delays

March–April is another pinch point when demand spikes again.

PMD and Architectural Hub project

Don’t Rush the DesignBut Do Start Immediately

The worst thing you can do in a busy period is rush your drawings.
The best thing you can do is start them sooner.

Good design takes time – but your architect can only begin once you’ve engaged them. Even beginning in January puts you ahead of the homeowners who wait until March.

The Fastest Route to “New Year, New Home”

If you missed the pre-Christmas planning window, don’t panic – but don’t wait.

Here’s the smart sequence:

  1. Engage an architect now – we’d love to help!
  2. Get your existing home surveyed
  3. Work through layout and design options
  4. Submit your planning application as early as possible
  5. Use the waiting period to prepare budgets and research builders
  6. Approve a builder once permission is granted

You’ll save months simply by moving early in the year – and you’ll have a much stronger chance of starting construction in the spring or summer.

Final Thought: You’re Behind, But You Can Still Get Ahead

Yes – January is the busiest month for planning approvals.
Yes – builders’ diaries fill up fast.
And yes – you’re technically already playing catch-up.

But catching up is easy when you start now.

A quick conversation with an architect gets everything moving.
Early drawings get your application into the system.
Approved plans help you secure a builder long before others even begin.

New Year, New Home? Absolutely – but only if you start today. Get in touch!

Seamlessly Blending Spaces: Integrating Outdoor and Indoor Living in British Homes

As homeowners, we are fortunate to experience a diverse range of weather throughout the year, from crisp spring mornings to warm summer afternoons and chilly autumn evenings. With such a varied climate, it’s no wonder that many of us seek ways to blur the boundaries between our indoor and outdoor living spaces, allowing us to enjoy the beauty of nature while still being sheltered and comfortable. In this article, we’ll explore the art of seamlessly integrating outdoor and indoor spaces in British homes, creating harmonious environments that embrace the best of both worlds.

1. Embracing the great outdoors

Homeowners have long had a deep appreciation for outdoor living, whether it’s enjoying a cup of tea in the garden on a sunny afternoon or hosting a barbecue with friends and family on a warm summer evening. To truly embrace the great outdoors, consider incorporating elements such as patios, decks, or terraces into your home’s design. These outdoor living spaces provide the perfect opportunity to relax, entertain, and connect with nature, all while enjoying the comfort and convenience of home.

2. Extending your living space

One of the most effective ways to integrate outdoor and indoor living spaces is by extending your home’s interior into the outdoors. Bi-fold or sliding glass doors seamlessly connect indoor and outdoor areas, creating a fluid transition between the two. When opened, these doors invite fresh air and natural light into your home, blurring the distinction between inside and outside. This not only enhances the sense of space and openness but also allows you to make the most of the beautiful landscape throughout the year.

3. Creating functional zones

When designing your outdoor living space, consider how you will use it and create functional zones that cater to your lifestyle. Whether it’s a cozy seating area for relaxation, a dining space for al fresco meals, or a fire pit for gathering around on cool evenings, dividing your outdoor space into distinct zones helps to maximise its usability and enjoyment. Similarly, extend this approach to your indoor living areas, ensuring that they are designed to connect with and complement your outdoor spaces seamlessly.

4. Embracing natural elements

Integrating outdoor and indoor living spaces is about physical connections and embracing natural elements throughout your home’s design. Incorporate materials such as stone, wood, and greenery to create a sense of cohesion between indoor and outdoor areas. From exposed brick walls and timber beams to indoor plants and living walls, these natural elements add warmth, texture, and visual interest to your home while reinforcing the connection to the surrounding landscape.

5. Enhancing privacy and shelter

While open-plan living is desirable, it’s also important to consider privacy and shelter, particularly in the unpredictable British climate. Incorporate features such as pergolas, awnings, or trellises to provide shade and protection from the elements, allowing you to enjoy your outdoor spaces in comfort year-round. Additionally, consider landscaping techniques such as hedges, fences, or screens to create a sense of privacy and seclusion without sacrificing views or natural light.

In conclusion, integrating outdoor and indoor living spaces in homes offers a myriad of benefits, from enhancing natural light and ventilation to creating functional and inviting environments for relaxation and entertainment. By embracing the great outdoors, extending your living space, creating functional zones, embracing natural elements, and enhancing privacy and shelter, you can create harmonious living environments that seamlessly blend the beauty of nature with the comfort and convenience of home. Whether you’re enjoying a lazy afternoon in the garden or hosting a lively gathering with friends, integrating outdoor and indoor spaces allows you to make the most of the landscape while enjoying the comforts of home.

Architectural Hub

Architectural Hub

Typically replies within an hour

I will be back soon

Architectural Hub
Hey there 👋
Interested in our services? We’re here to help!
WhatsApp